Landscape Photography Field Tips
In landscape photography, the difference between coming home with a strong image—or nothing at all—often comes down to how effectively you work once you’re on location.
Being in the field presents constant variables: changing light, shifting conditions, and limited time to respond. The photographers who consistently capture compelling images aren’t just reacting to those conditions—they’re prepared for them, and they know how to move efficiently when it matters.
You can’t control the environment—but you can control how you work within it.
These field tips are built around that idea. From planning and light awareness to gear familiarity and shooting technique, each one is designed to reduce friction in the field so you can focus on composition, timing, and decision-making when conditions align.
This approach is based on real field practice, not theoretical workflow design.
Location Familiarization Before You Arrive
One of the most effective ways to improve your results in landscape photography happens long before you arrive on location. The strongest images are rarely accidental—they’re the result of understanding a place before you ever raise the camera.
With the amount of visual reference material available today, it’s possible to study almost any location in advance. The goal isn’t to remove spontaneity, but to arrive with enough awareness that you can respond intentionally rather than react blindly.
Good fieldwork starts at the desk, not in the field.
For a weekend trip to Dinosaur Provincial Park in Alberta, I treated location research as part of the creative process rather than preparation alone.
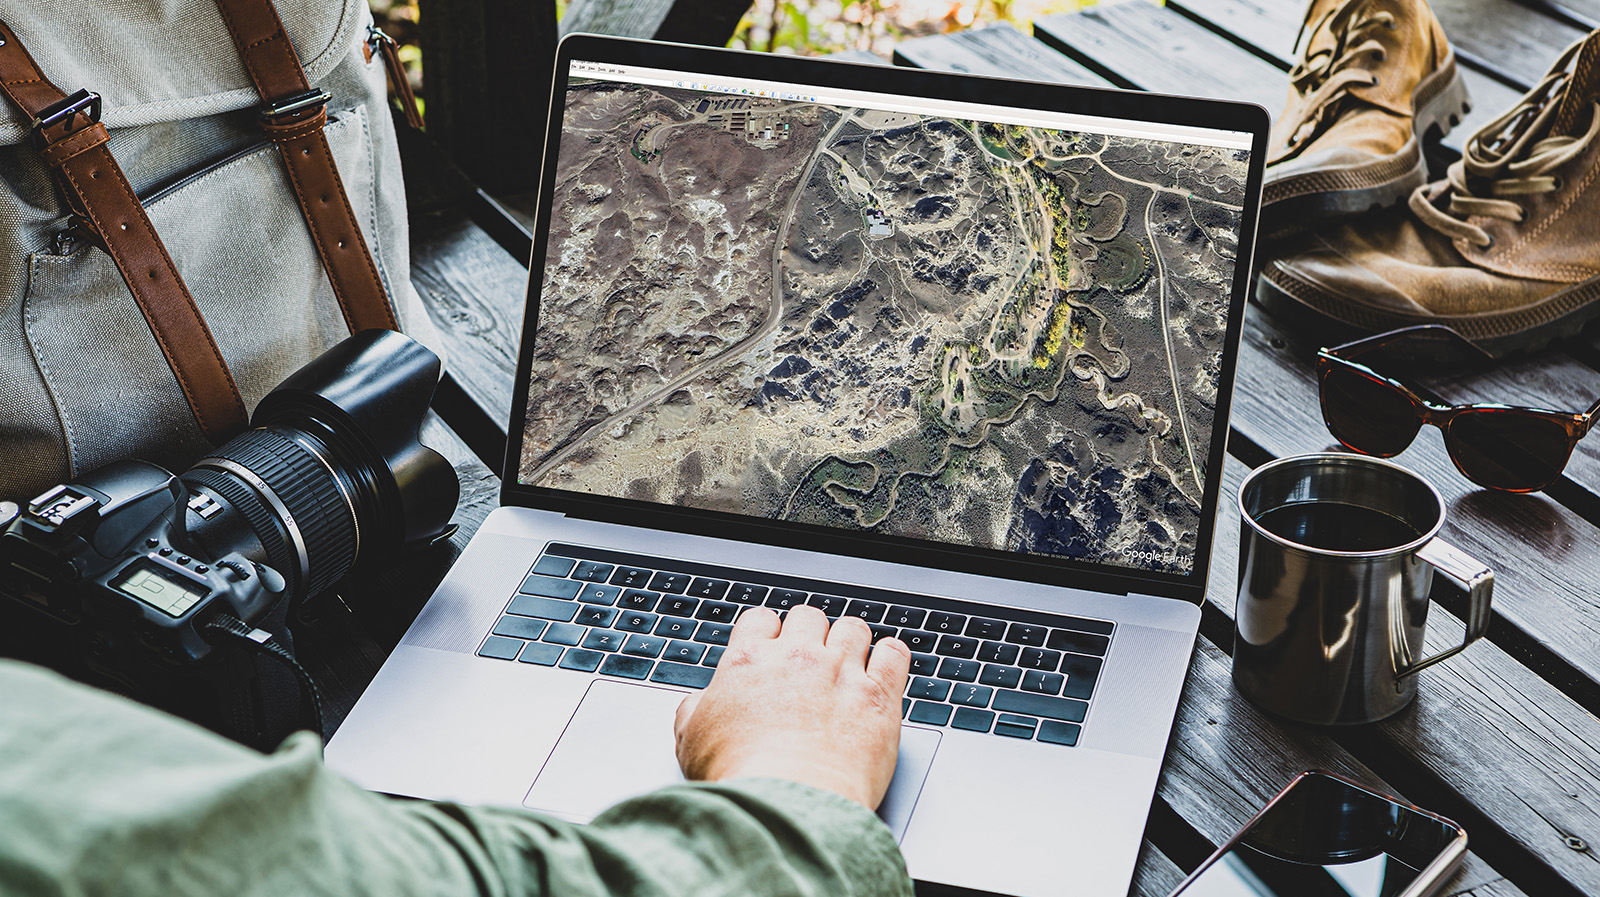
At home, I began by exploring the landscape in Google Earth, moving through the terrain at different scales to understand how the valley systems and ridgelines connected. This helps build a mental map of how light might behave across the landscape, especially in wide, open environments like the Canadian badlands.
Alongside this, I reviewed existing imagery of the area to understand what others had already photographed—and more importantly, what they consistently returned to as subjects. This isn’t about copying scenes, but about identifying visual anchors within a location.
A simple image search revealed recurring elements such as layered sediment formations, exposed ridges, and strong geometric patterns in the terrain. These became reference points, not targets.
Before leaving, I wasn’t trying to pre-build compositions. Instead, I was building familiarity. That distinction is important. Familiarity creates speed through recognition, not movement.
When you arrive already understanding a place, you spend less time figuring it out—and more time responding to it.
Understanding Light Movement Across the Landscape
Light is the single most important variable in landscape photography. Composition, location, and subject matter all depend on it—but light ultimately determines whether those elements succeed or fail.
This is why experienced photographers rarely approach a location without first understanding how light interacts with the landscape. The goal isn’t simply to know when sunrise or sunset occurs, but to understand how those moments align with the direction, structure, and scale of your subject.
Good light is predictable. Great light is planned.
Modern planning tools now make this process far more precise. One of the tools I regularly use is The Photographer’s Ephemeris, which allows you to map the position of the sun and moon in relation to specific terrain.
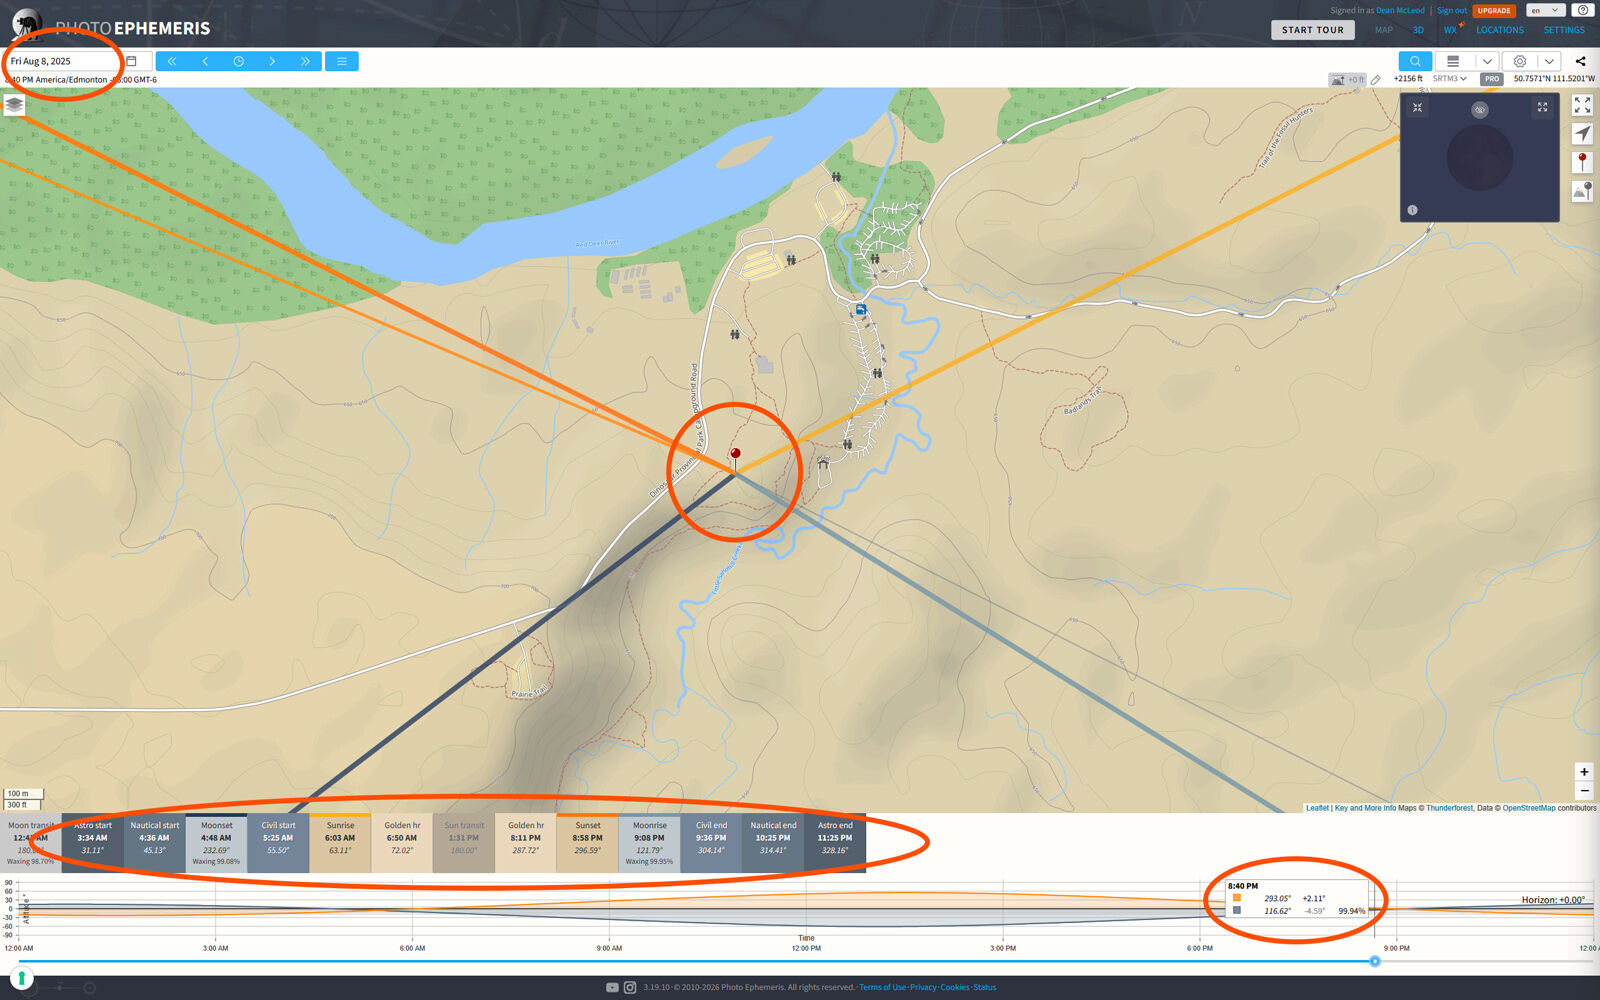
The screenshot above illustrates how I use this tool when planning a location such as Dinosaur Provincial Park in Alberta.
Key elements include:
- Placement of a location pin to anchor the scene geographically
- Sun and moon rise and set vectors showing directional light paths
- Time-based controls showing how light direction shifts throughout the day
- Highlighted periods indicating optimal shooting windows such as golden hour
What this provides is not just technical data, but spatial awareness. You begin to understand how the landscape will respond to light before you arrive.
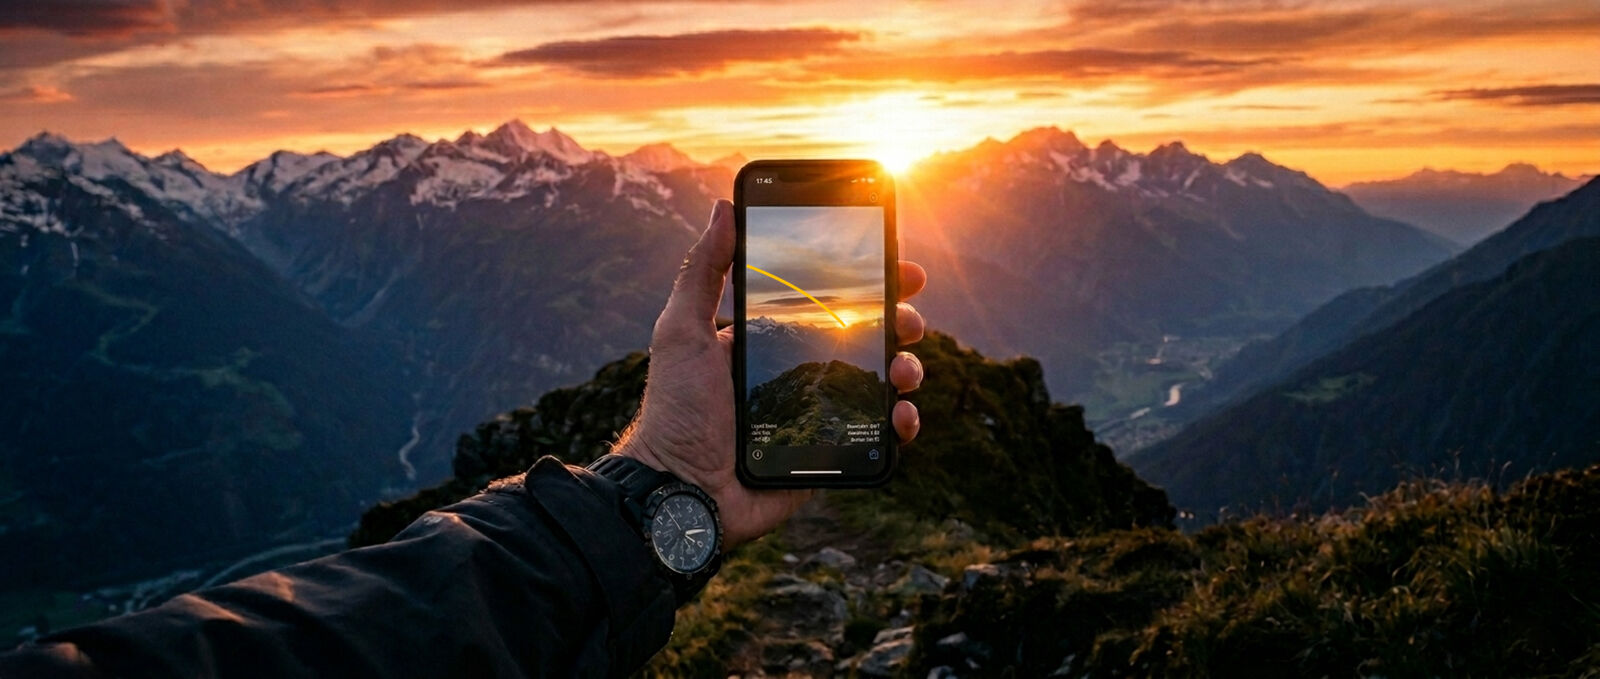
In the field, tools like PhotoPills take this a step further. Using augmented reality, you can hold your phone up to the landscape and see exactly where the sun or moon will rise, set, or move across the sky at any given time. This allows you to confirm your planning in real time and refine compositions with precision.
This changes how you approach the scene. Instead of treating it as a single viewpoint, you start to see it as a system of light-dependent opportunities. You are no longer reacting to conditions as they happen. You are working within them.
And when everything aligns—the light, the direction, the timing—it no longer feels accidental.
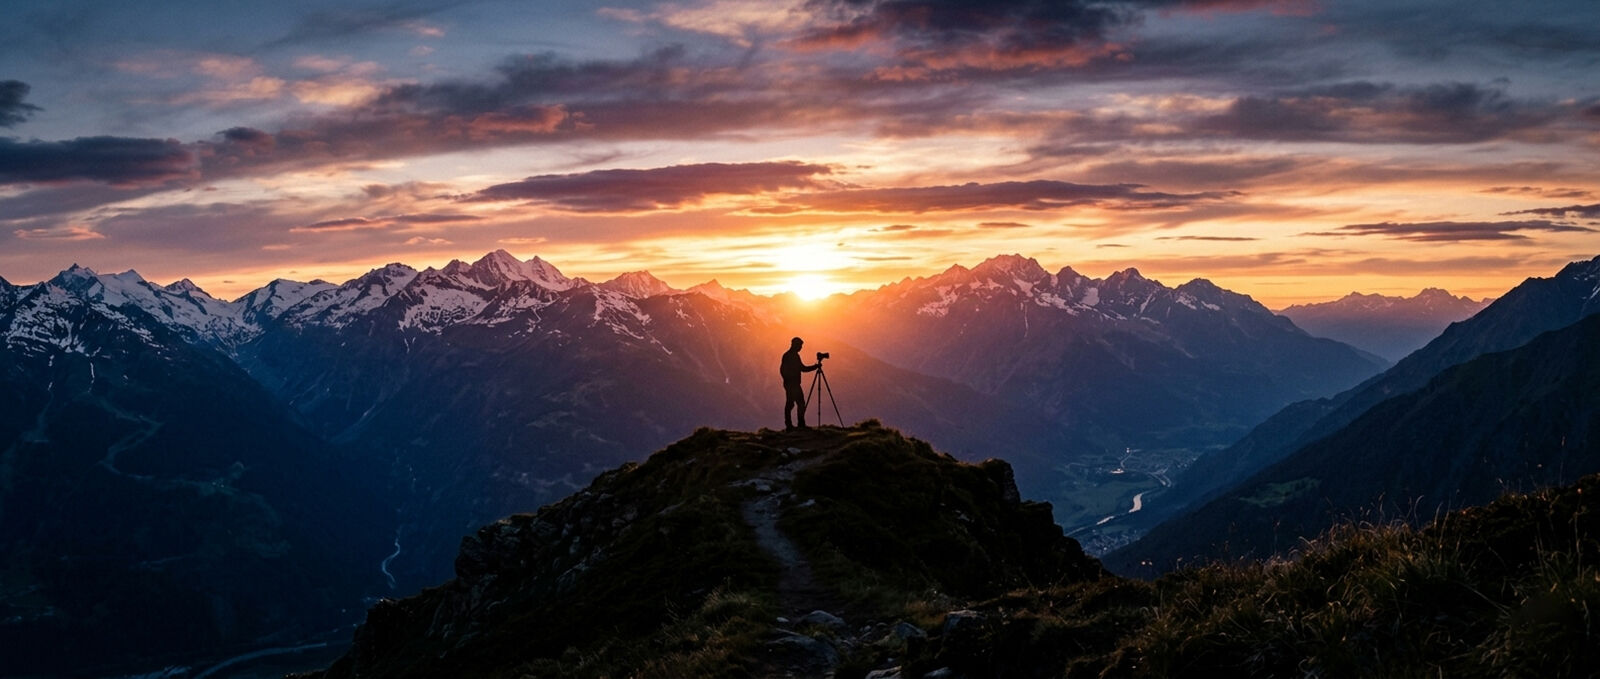
Arriving Early to Work the Scene
Once you understand a location and how light will move through it, the next step is simple—but often overlooked: give yourself time to use that information.
Arriving early isn’t about waiting. It’s about removing pressure.
When you reach a location well before the light peaks, you can move through the landscape deliberately—testing compositions, refining angles, and identifying foreground elements without distraction.
The best compositions are rarely found when the light is already happening.
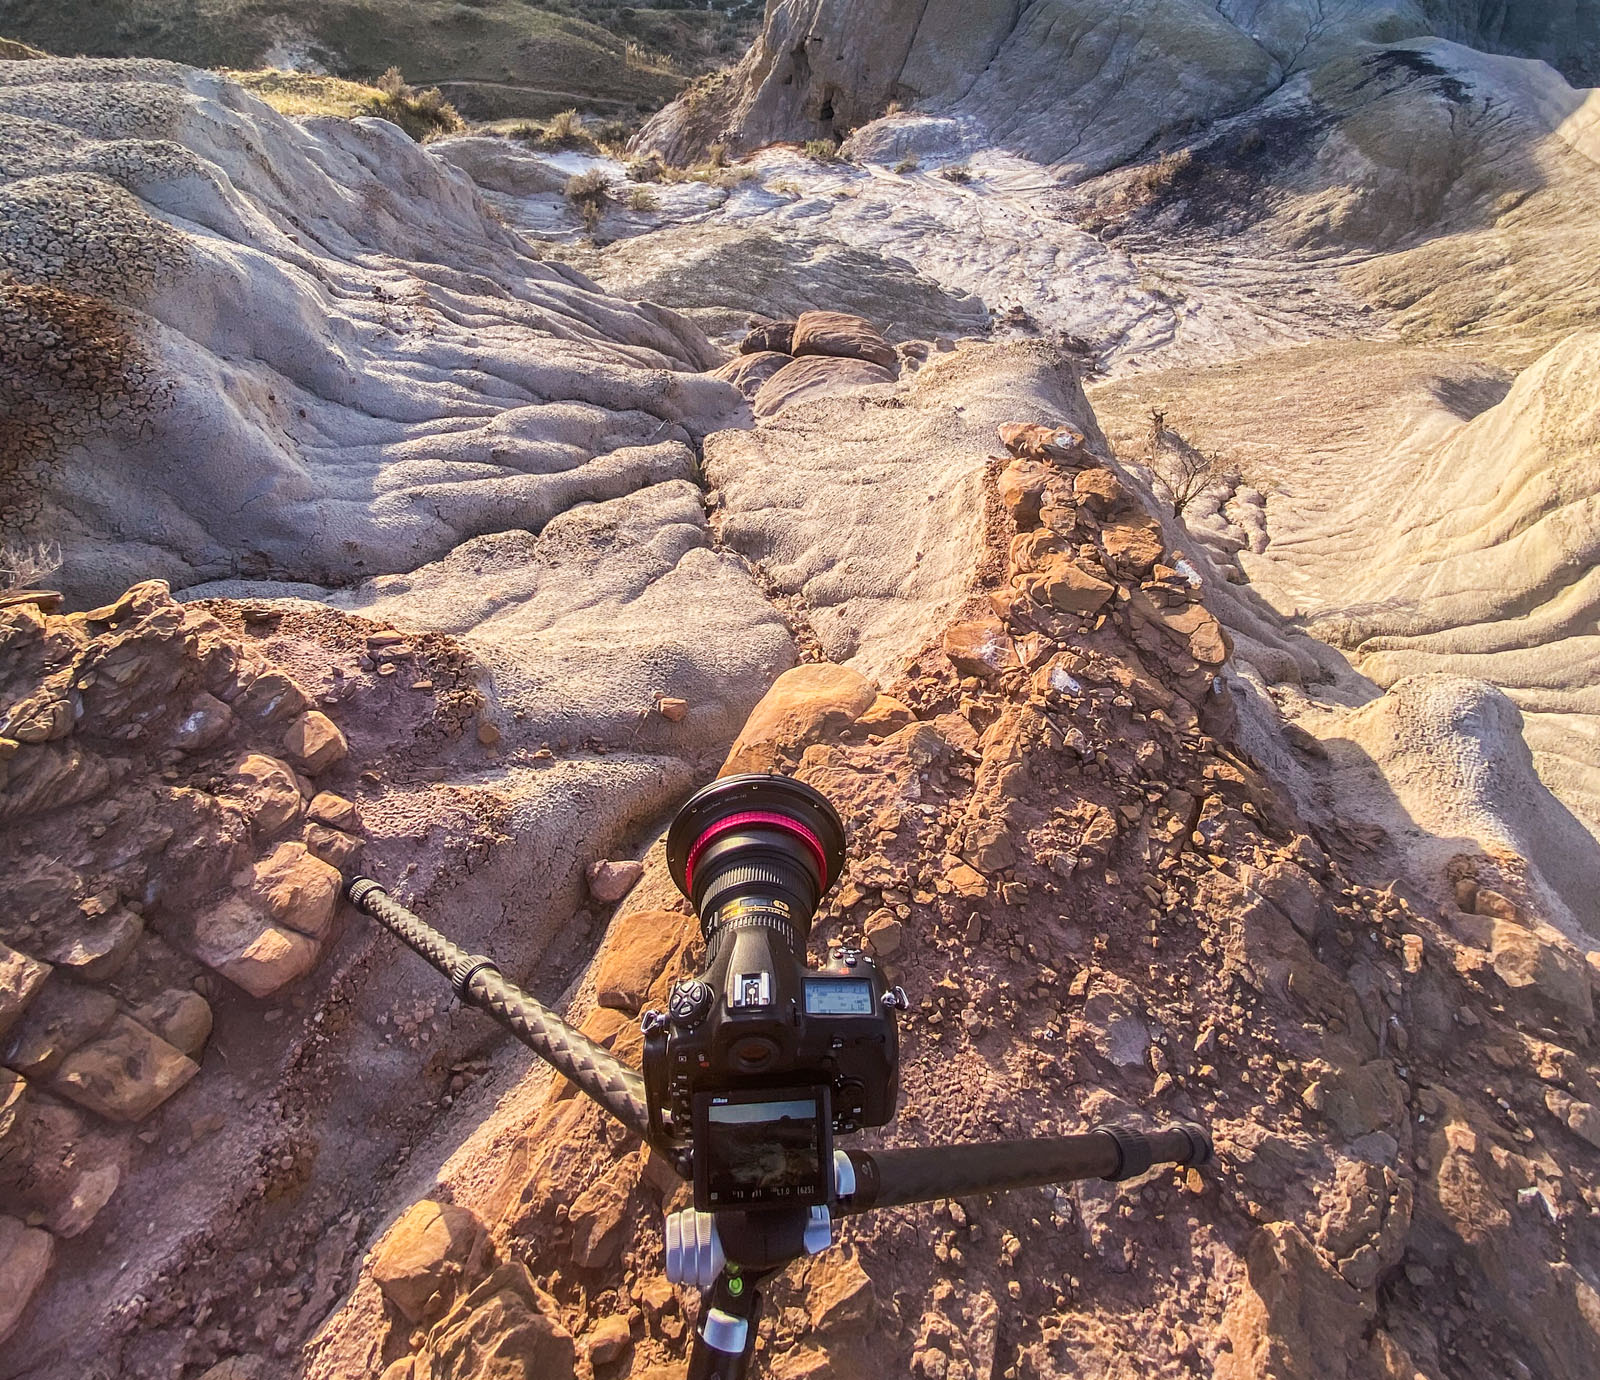
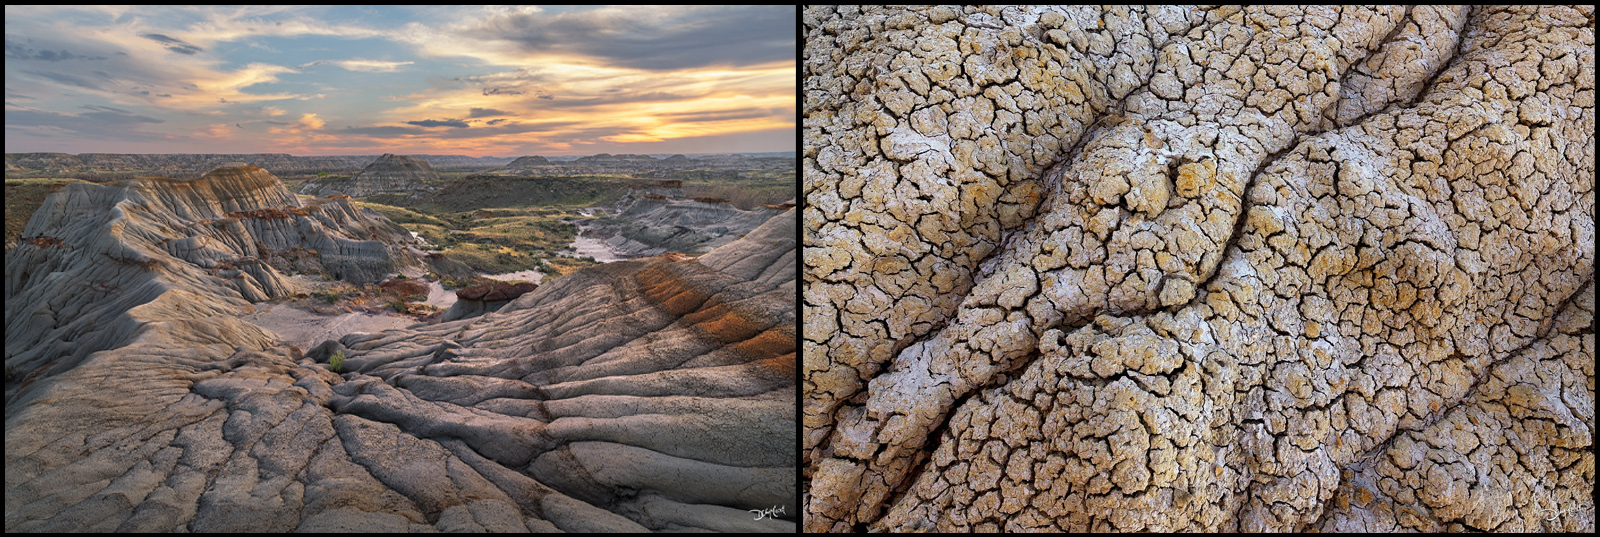
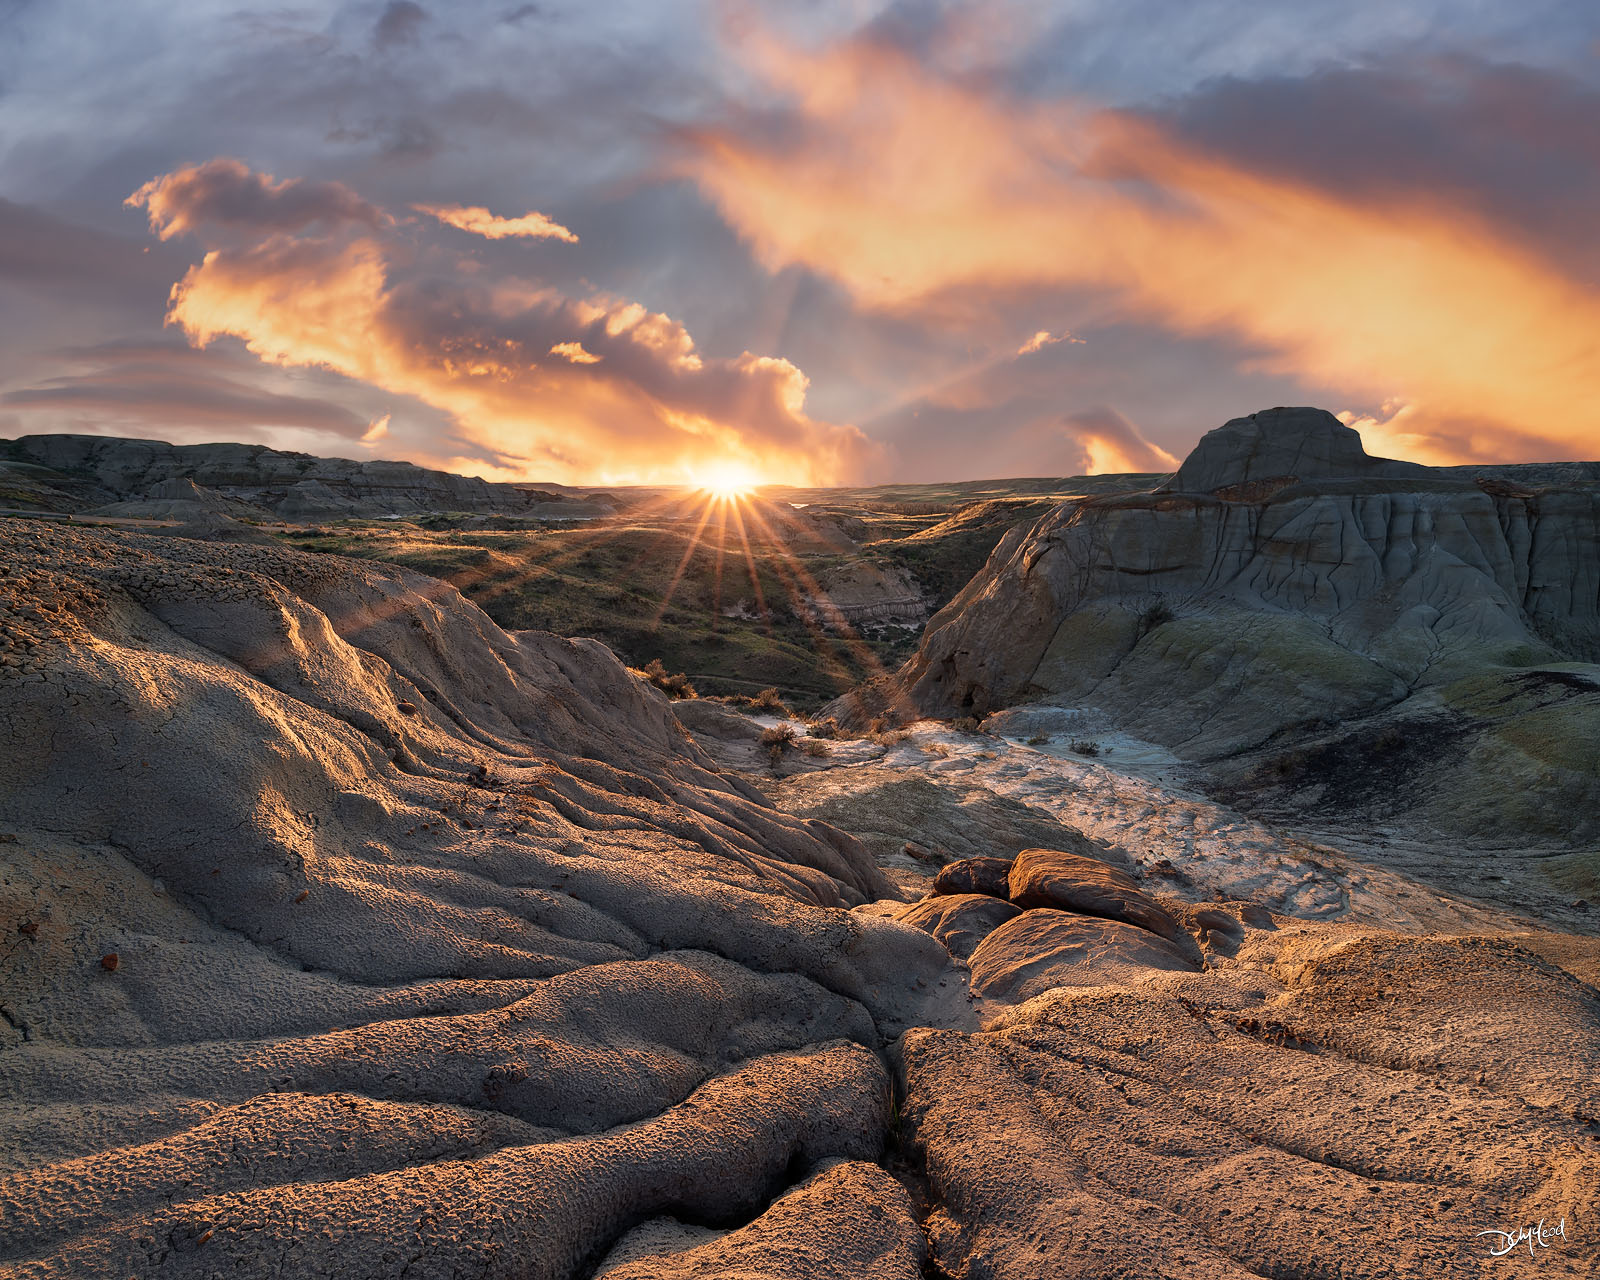
While scouting Dinosaur Provincial Park in the afternoon, I came across a formation where erosion lines carved through the terrain, naturally directing the eye toward the center of the scene. The composition was already there—it just needed the right light.
Based on earlier planning, I knew exactly where the sun would set and how it would align with the ridges. That allowed me to commit to a composition early, rather than guess under pressure.
By the time the sun dropped toward the horizon, there was no need to search or adjust. The composition was set, and attention shifted entirely to timing and refinement as light moved through the scene.
We’ve all experienced the opposite—arriving late, chasing fading light, and trying to force a composition under pressure. It rarely leads to strong results.
Arriving early changes that completely. It gives you space to think, adapt, and recognize opportunities before they disappear. In landscape photography, timing isn’t just about light—it’s about readiness.
Moments like that feel effortless in hindsight—but they’re built long before the light arrives.
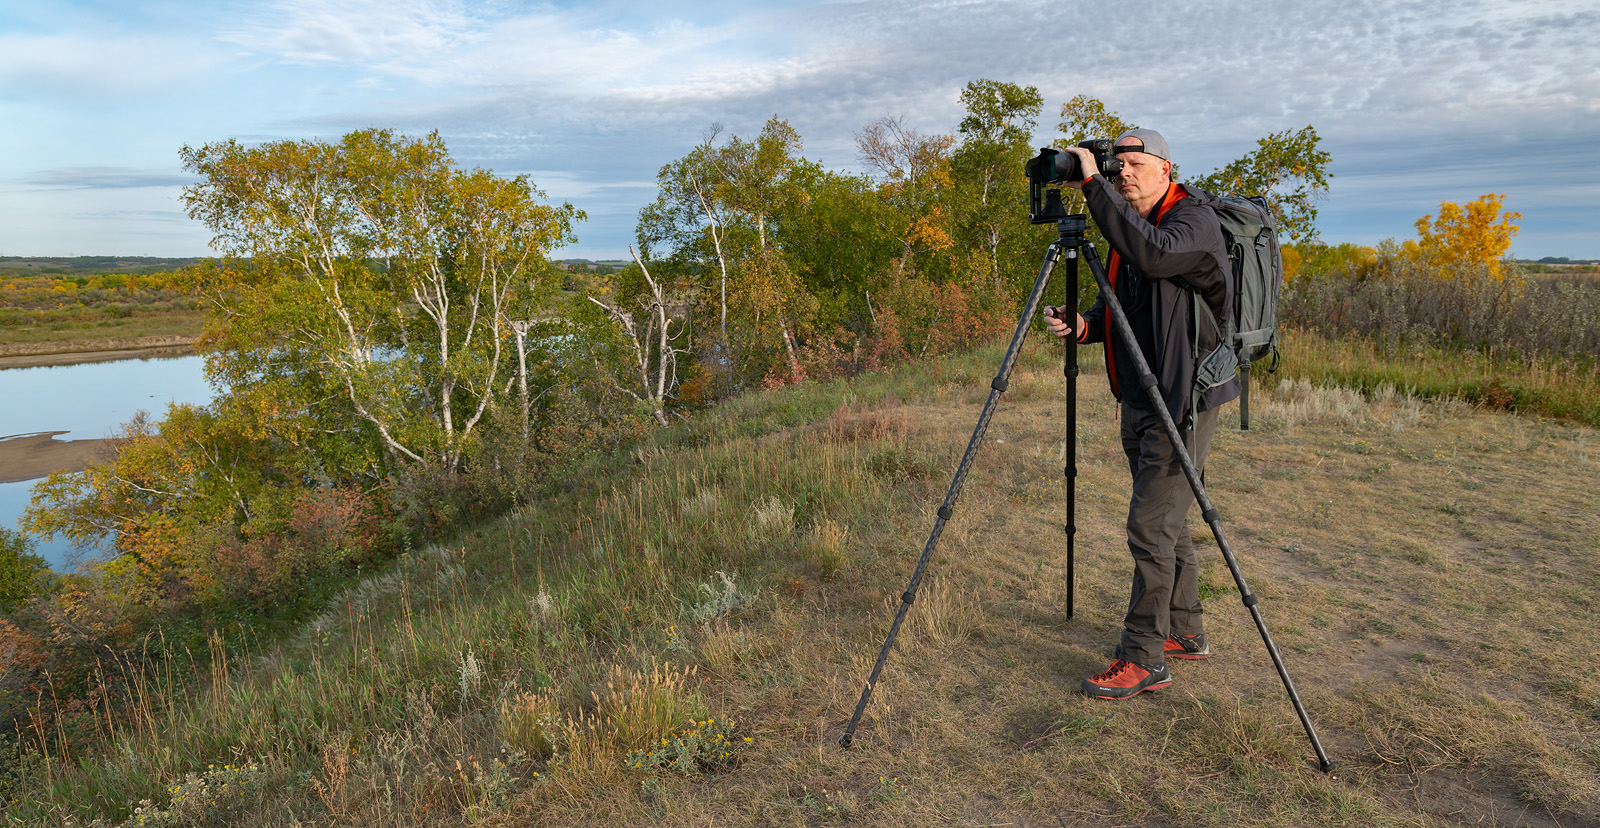
Developing Confidence With Your Equipment
Technical skill in the field isn’t just about understanding photography—it’s about removing hesitation. When conditions change quickly, there’s no time to think through camera settings or navigate menus. Every adjustment needs to be instinctive.
In fast-changing conditions, hesitation costs images.
Being comfortable with your camera, tripod, and accessories reduces cognitive load. Instead of dividing attention between settings and composition, you stay focused on the scene itself.
During a helicopter flight over active lava in Hawaii, I was reminded of this the hard way. The shooting conditions were fast, unstable, and constantly changing.
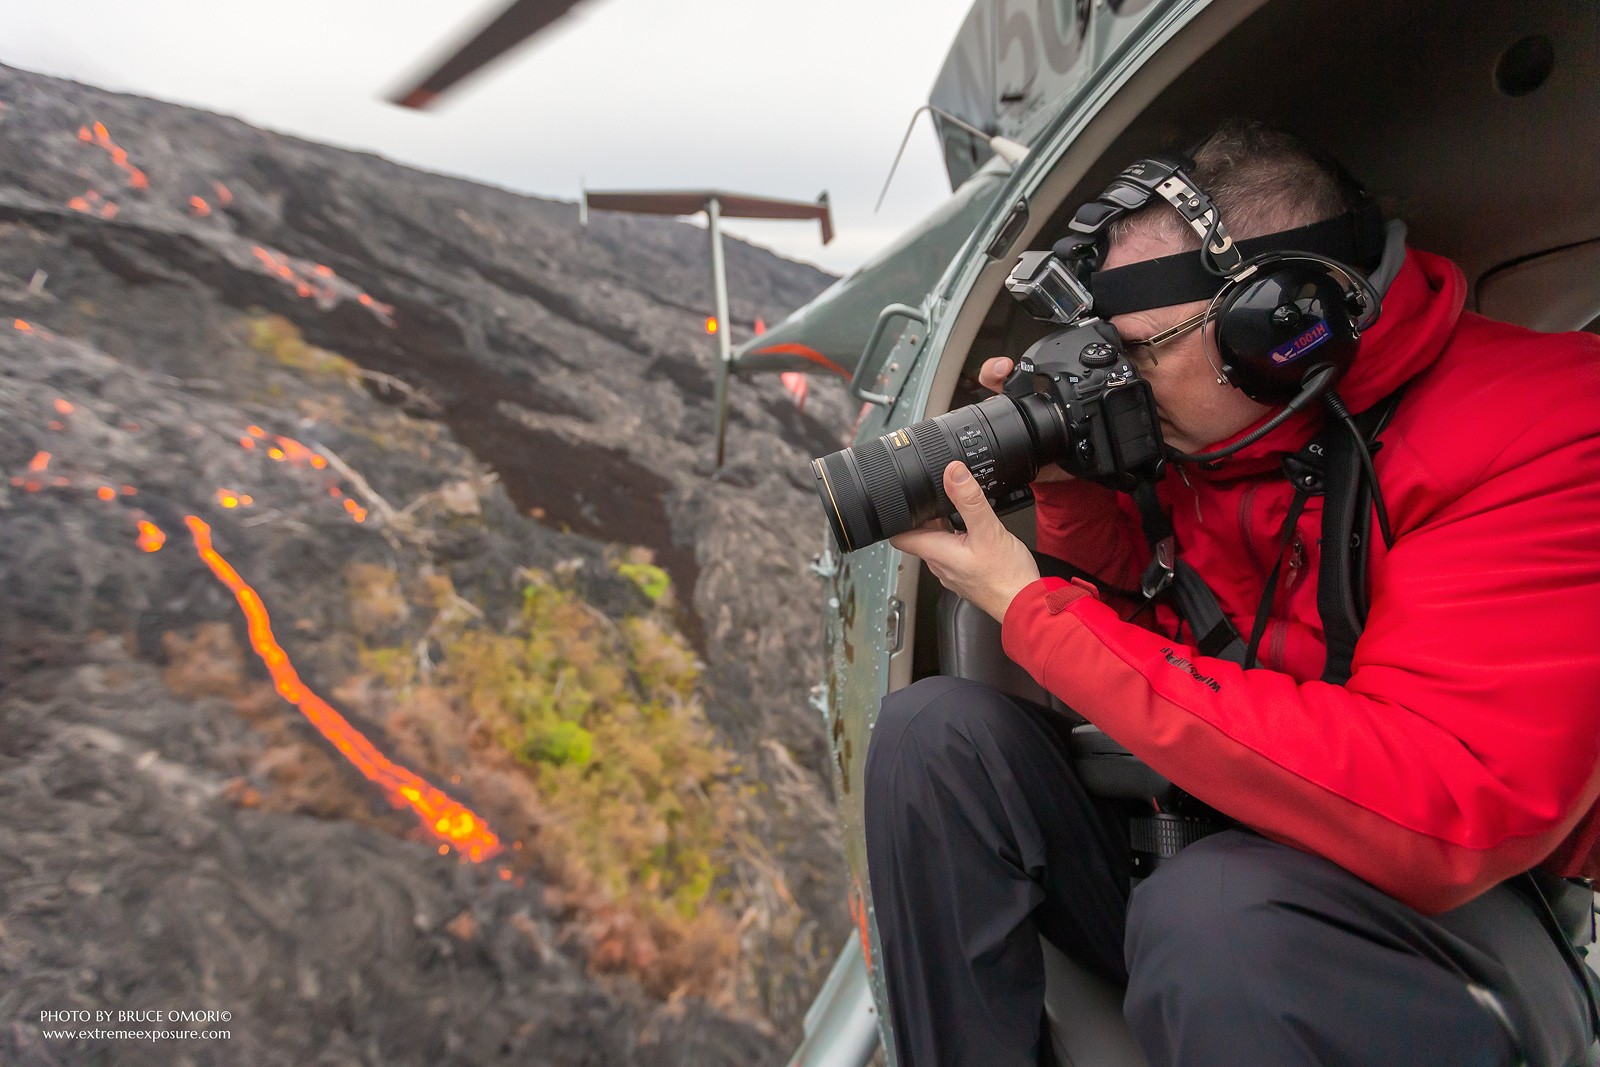
Before takeoff, I was advised to work in shutter priority with auto ISO. It was straightforward—but not something I used often. In the moment, I struggled to configure my camera properly while already in the air. My attention was divided, and by the time everything was set, the opportunity was underway.
After landing, I discovered I had incorrectly configured my ISO limits, locking the camera into a high sensitivity setting for the entire flight. The result was a full set of images compromised by unnecessary noise.
The lesson wasn’t about one mistake—it was about familiarity. It’s one thing to understand your camera. It’s another to trust it without thinking.
Your camera should never be the thing that slows you down.
Resetting Camera Settings for Each Shoot
Even with strong planning and timing, it’s easy to undermine an image with incorrect settings. Conditions change. Subjects change. And your camera always remembers the last thing you shot.
Before you take your first frame, confirm your settings.
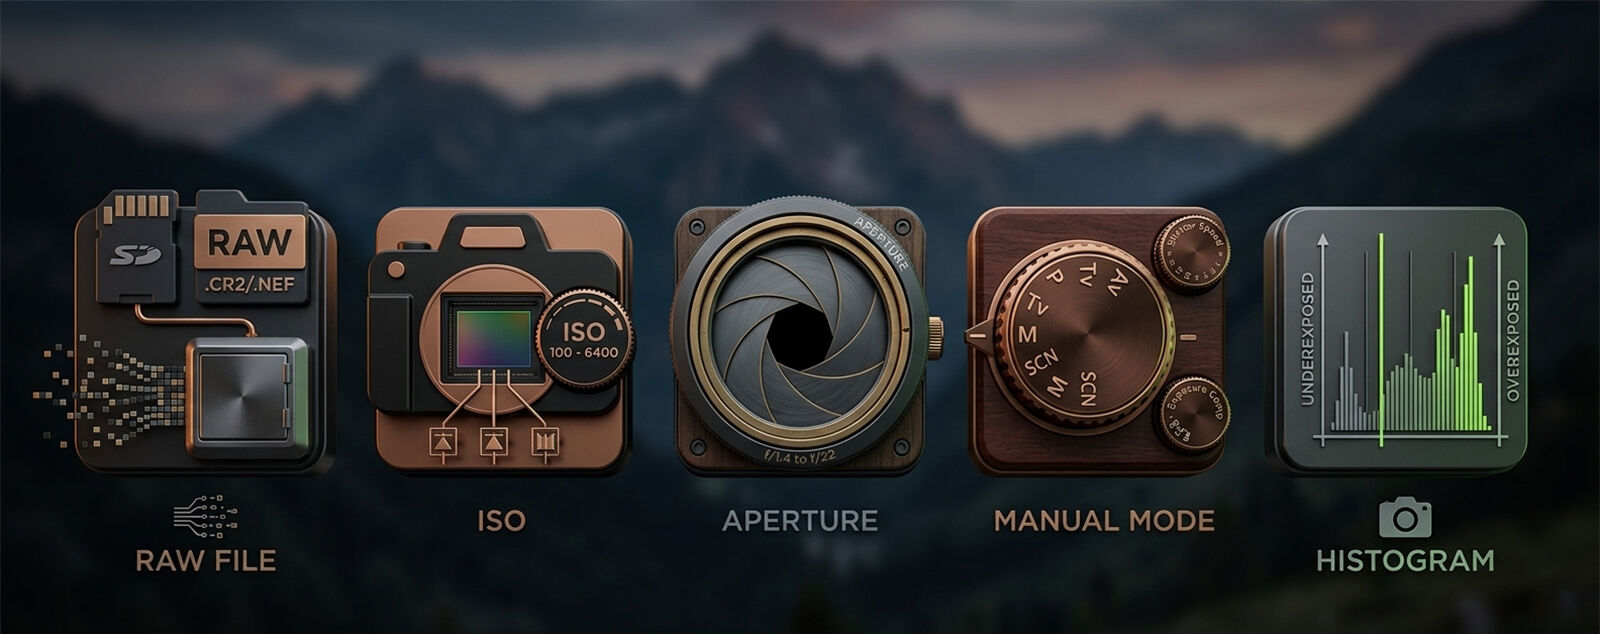
• Shoot in RAW.
RAW files preserve the full range of data captured by your sensor, giving far greater control in post-processing. JPEG files discard this information through compression.
• Keep ISO as Low as Practical.
Lower ISO produces cleaner files with less digital noise. Raise ISO only when needed to manage motion or shutter speed.
• Use an Optimal Aperture.
Every lens has a sharpest range, typically a few stops down from wide open. For many lenses, this falls around f/8 to f/11.
• Work in Manual Mode.
Manual exposure gives full control over consistency and creative intent.
• Use Your Histogram.
The histogram is more reliable than the LCD for exposure evaluation. Highlight warnings help identify clipped areas immediately.
Strong images are rarely lost in post—they’re lost at the moment of capture.
And in the field, you don’t always get a second chance to correct them.
Working the Field With Efficiency
Efficient fieldwork is about how you physically engage with a scene. In the field, I rarely start with a tripod. Instead, I move through the location handheld, testing angles and perspectives quickly.
The tripod should support a decision—not create one.
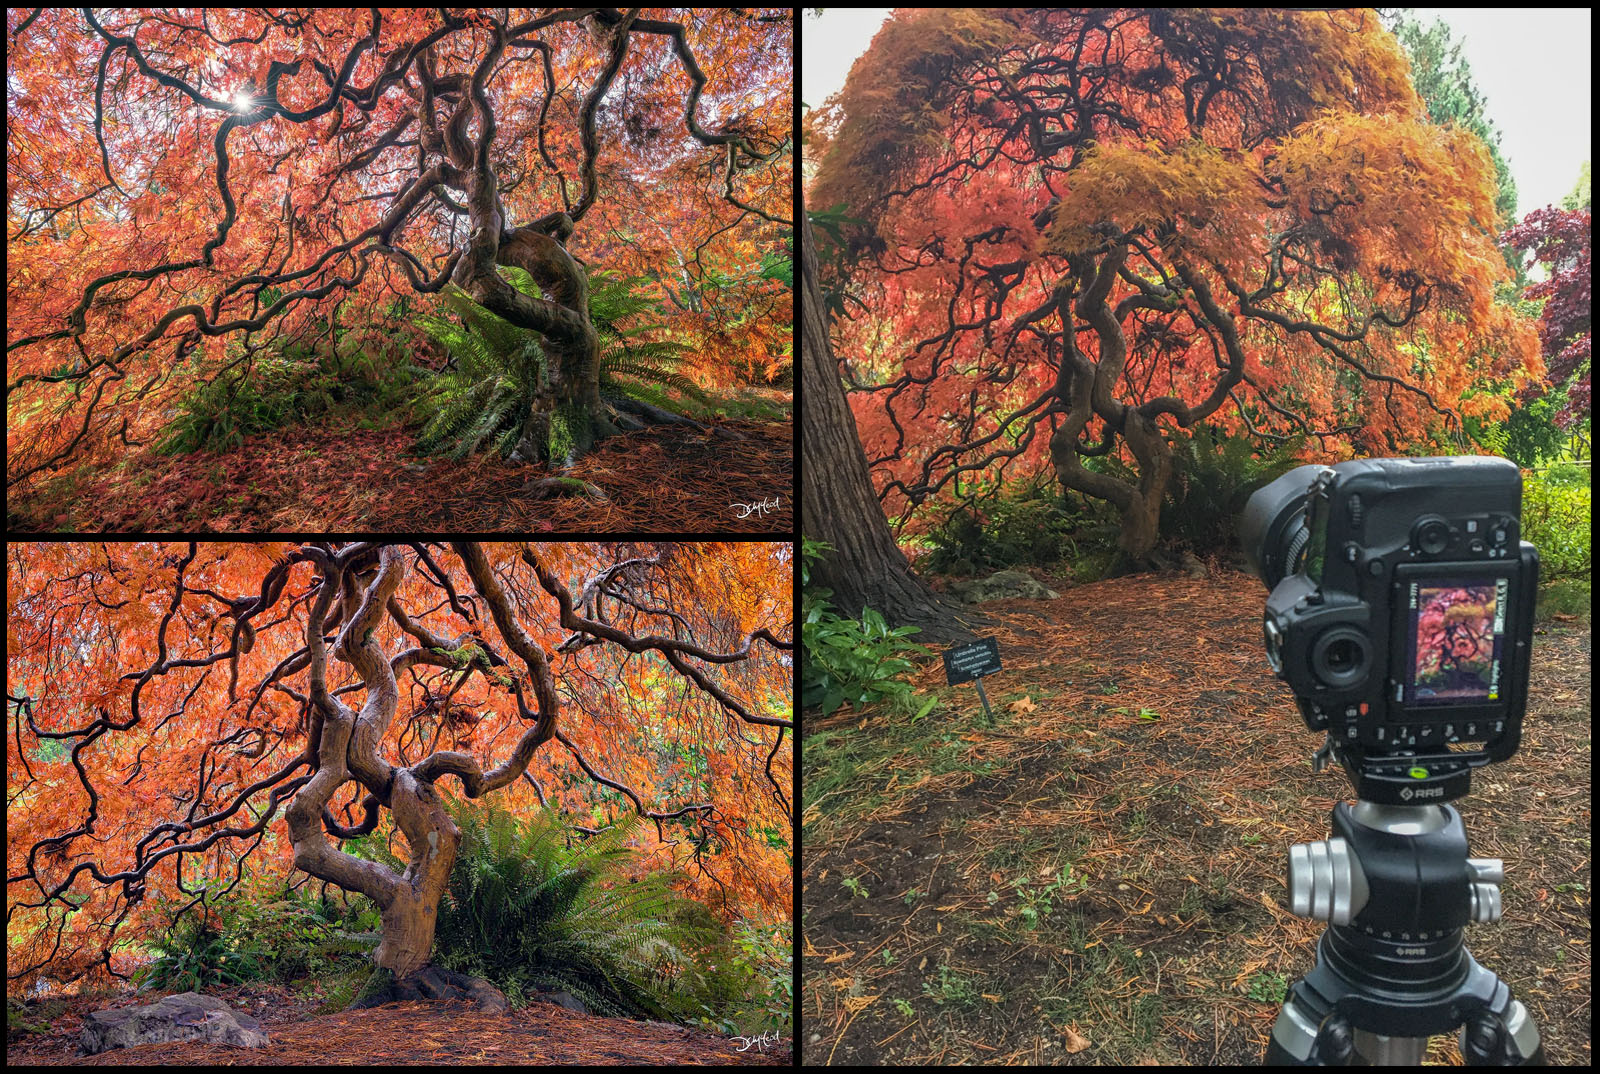
When working with subjects like a Japanese maple tree, I’ll often circle the subject, testing how it looks from different positions. This allows me to evaluate compositions in real time without committing too early.
Only once the composition is clear do I bring in the tripod. At that point, the setup becomes fast and deliberate. One of the most common inefficiencies is committing to a tripod too early, then repeatedly adjusting position as the composition evolves.
Working handheld first removes that friction. Efficiency in the field isn’t about moving faster—it’s about knowing when to commit.
And knowing when to commit usually comes from experience—not hesitation.
Protecting and Organizing Your Images After Capture
The workflow doesn’t end when you leave the field. What you do afterward is critical to protecting your work.
The first priority is always backup.
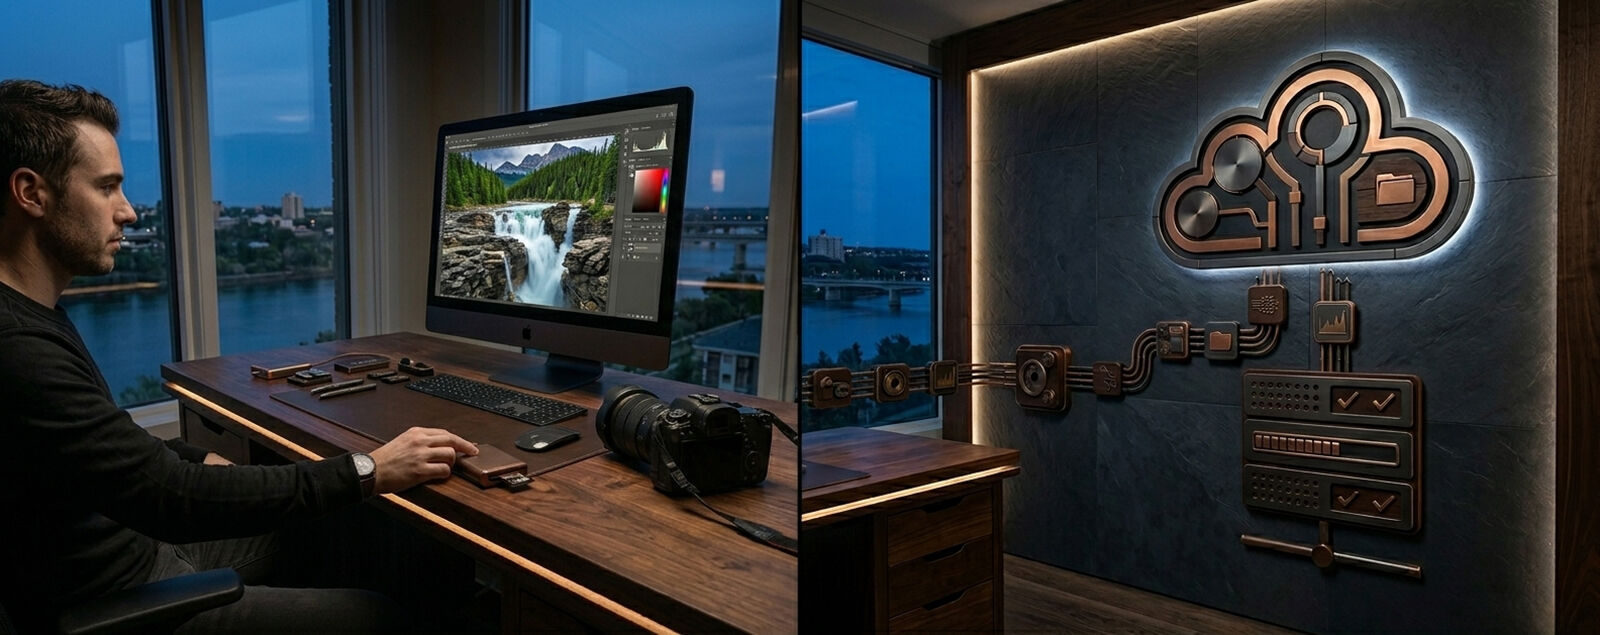
I import RAW files into Adobe Lightroom, then immediately duplicate them onto two external hard drives labeled by date and location. One drive is stored separately offsite for redundancy in case of hardware failure or damage.
For additional security, I also use cloud storage, ensuring images are accessible even outside my home system.
The goal is not just storage—it’s security.
Once backed up, memory cards are formatted and returned to the kit, ready for the next shoot.
Small Habits That Improve Field Efficiency
Small systems often have a large impact over time.
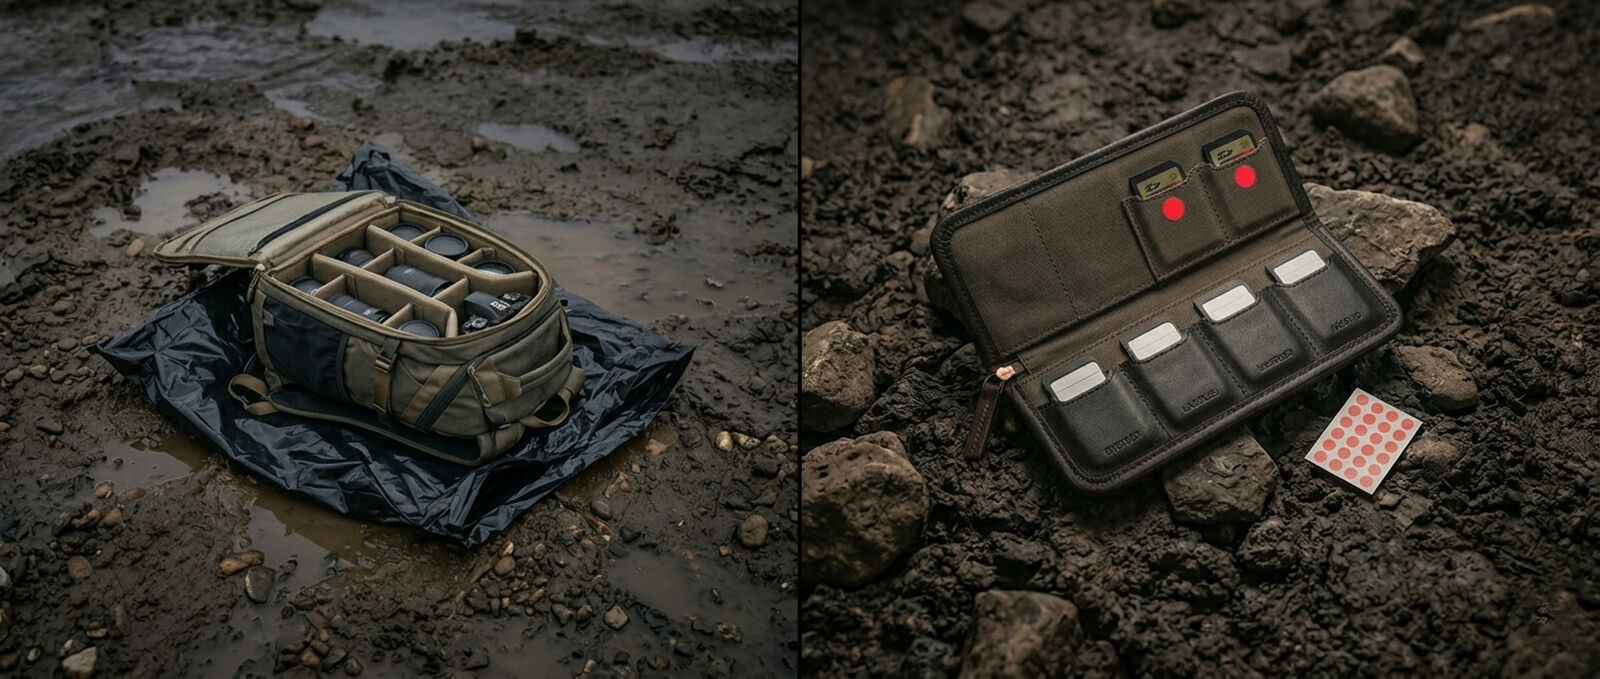
• Carry a Protective Ground Layer
A simple plastic bag prevents placing gear directly on wet or muddy ground.
• Mark Used Memory Cards
On longer shoots, marking full cards with a small sticker avoids confusion and saves time in the field.
These habits reduce friction and keep attention on shooting, not logistics. They’re small things—but in the field, small things add up quickly.
Closing Thoughts on Field Preparation
Whether you are photographing close to home or travelling to remote locations, preparation consistently leads to more productive and less stressful time in the field.
In landscape photography, opportunities often appear quickly and disappear just as fast. The photographers who consistently come home with strong work are rarely reacting in the moment—they are prepared before it happens.
Being prepared doesn’t guarantee great images—but it dramatically increases the chances of being ready when they do. Ultimately, improving field technique isn’t about doing more. It’s about removing friction so you can respond to the landscape itself, not the process around it.
And when everything comes together, the process disappears—and you’re left with the moment.